Adrian Herbez Rotating Header Image

Web-based CAD for cams

Impatient? See the tool for yourself here

This past weekend, I went to an estate sale and snagged a two-volume set of “Ingenious Mechanism for Designers and Inventors” from 1936 for a whopping $4 (I was happy, to say the least).

I was flipping through it and was struck by an illustration of a cylindrical cam with a sinusoidal groove for making two slides move in opposite directions at the same time. It’s not particularly complicated, but struck me as something that would be kinda hard to do in CAD.

While I’m sure that there’s a way to achieve that in FreeCAD, I thought it would be fun to whip together a web-based tool to generate such models in a parametric way, so I did just that:
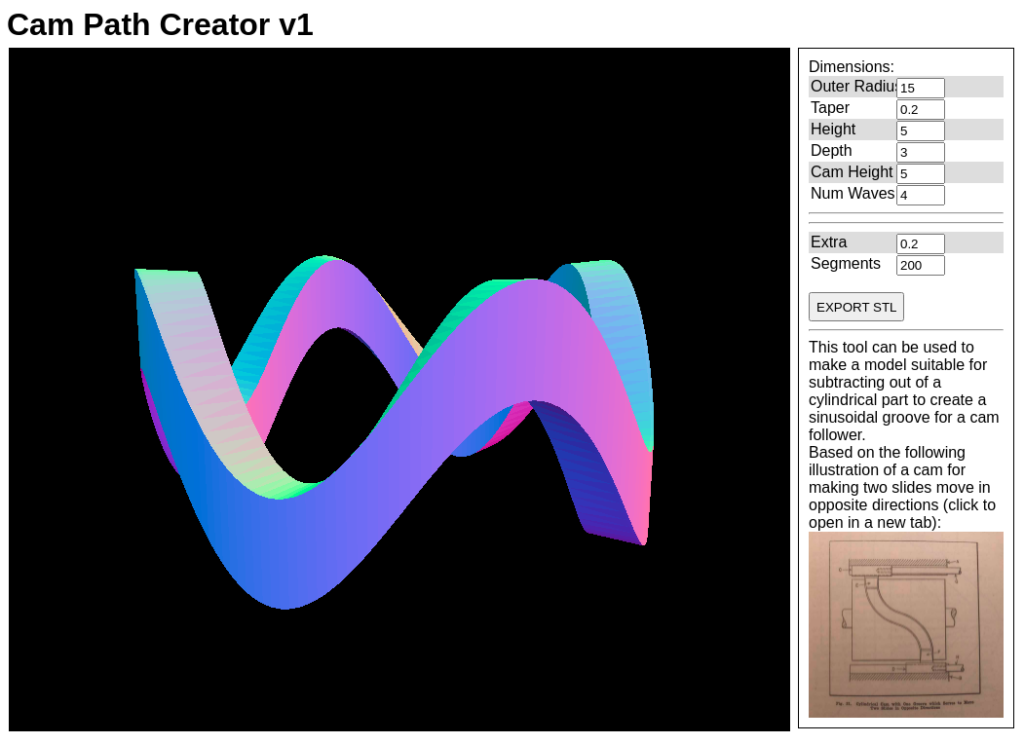
Instead of generating the full cam, I focused on just making the hard part- the sinusoidal groove. I thought that in any actual application, it was probably make sense to make the base shape of the cam in FreeCAD (or similar), including any additional (and possibly complex) features, then add a boolean operation to cut out the groove.

This ended up being pretty easy, especially since I had the simple web-based CAD starter project I created for the talk I gave at last year’s Roguelike Celebration.

The tool lets you specify the outer radius, the depth of the groove, the number of crests and their height, and an amount of taper. Once that’s all set up to your liking, click the button to get an STL.

Bringing that into OpenSCAD and subtracting it from a cylinder gives something like the following:

And then printing it out gives you something like…
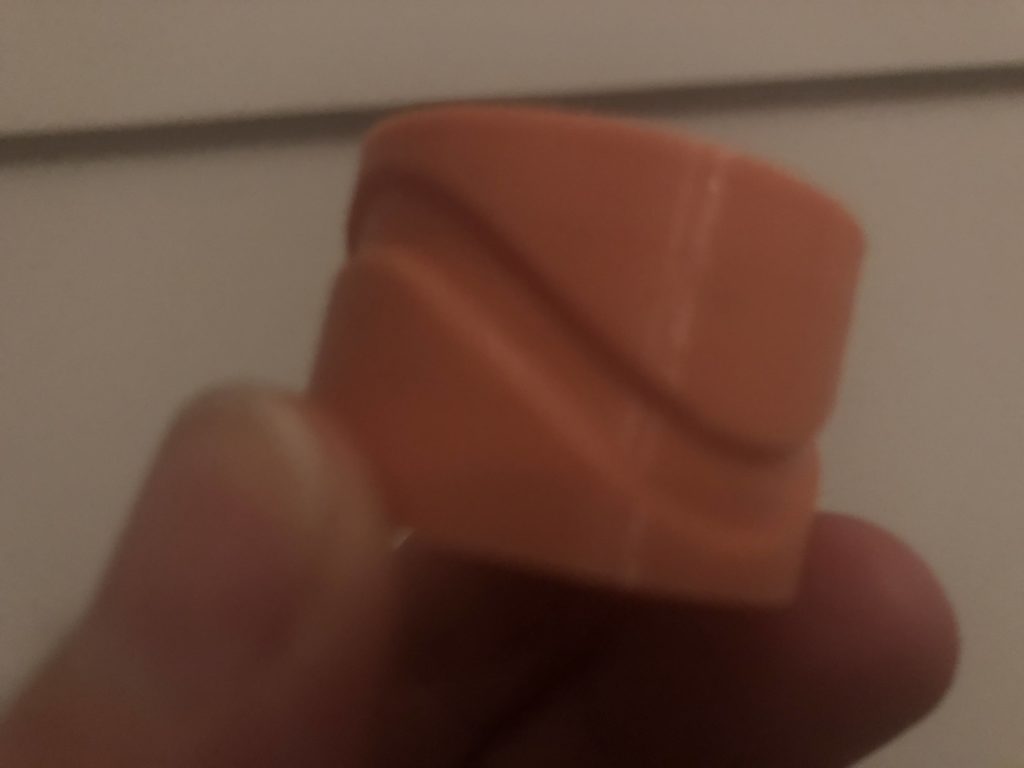
It’s a simple test, and hasn’t been proven out via inclusion in an actual mechanism yet, but results are promising so far. Not bad for a couple hours of javascript.

If you want to play with it yourself, head here: https://zanzastoys.com/camcad/. I’ll be releasing a video on how I made it soon on my YouTube channel– if that sounds like something you’d be into, please consider subscribing.

Veve v0.1

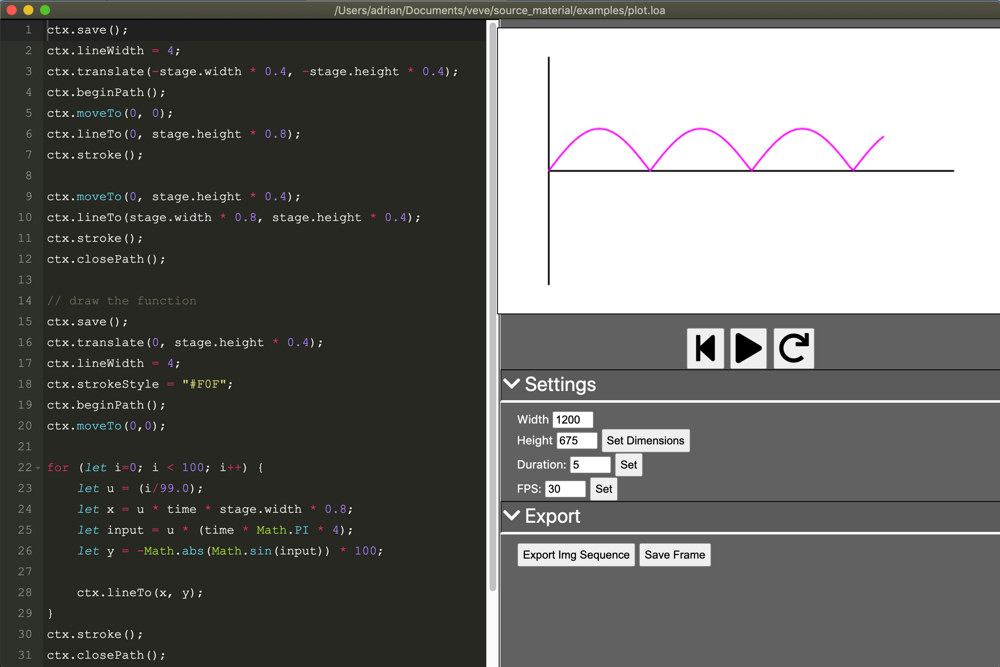
I recently found myself wanting to be able to code up some animations and maybe some graphs for my youtube channel (Zanzas Toys), but wasn’t able to find a good tool for creating 2d animations with code and outputting video. So, I decided to make one, and Veve was born.

I really like using the canvas API for drawing 2d content, and I’m really comfortable with it, so I made an Electron app that allows the user to write code (in the left half) that is then used to draw content into a canvas (on the right). For the text editor, I used Monaco, which worked out really well.

The user can set the dimensions of the canvas, the duration, and the FPS, control the playback with buttons underneath the canvas, and export the result as a single image, an image sequence, or a video.

It also saves the user code and document settings to a custom file format (basically just json) named “.loa”.

Here’s a short video of what it looks like to code up a simple animation using it:

I’ll eventually open-source it, but it needs a little more work before it’s ready for that.

Make a thing to Make a thing

This was a talk I gave at this year’s Roguelike Celebration, the annual mini-conference for roguelike games and procedural content. This year, I gave a short presentation on how to use Three.JS to create web-based CAD tools to produce 3d-printable models.

In the talk, I show my web-based greeblie modeler, then I walk through how to create a simple tool to make a box of a given size and export it as a 3d printable STL file. To see the whole talk, head here.

Greeble Modeler: update #2

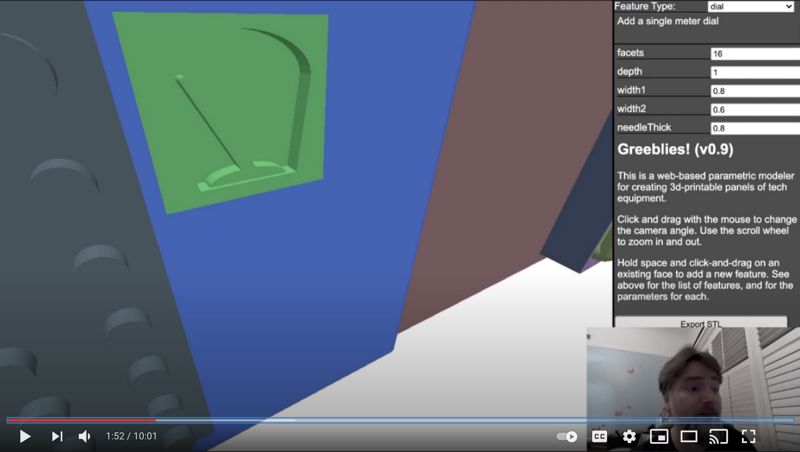
Lots more progress on my web-based parametric modeler for 3d-printable tech panels. I’ve added in two new feature types:

  • handles: similar to the kind of handles one sees on rack-mounted equipment, including configurable thickness and height from the surface
  • dials: the kind of indicator you might see on old equipment to provide voltage or other data

I’ve also added in the first steps towards a nicer UI in the right-hand side of the page, including swapping out the parameters based on the selected feature type.

See it in action for yourself here: http://adrianherbez.net/greebles/08/

Hole-y Quads!

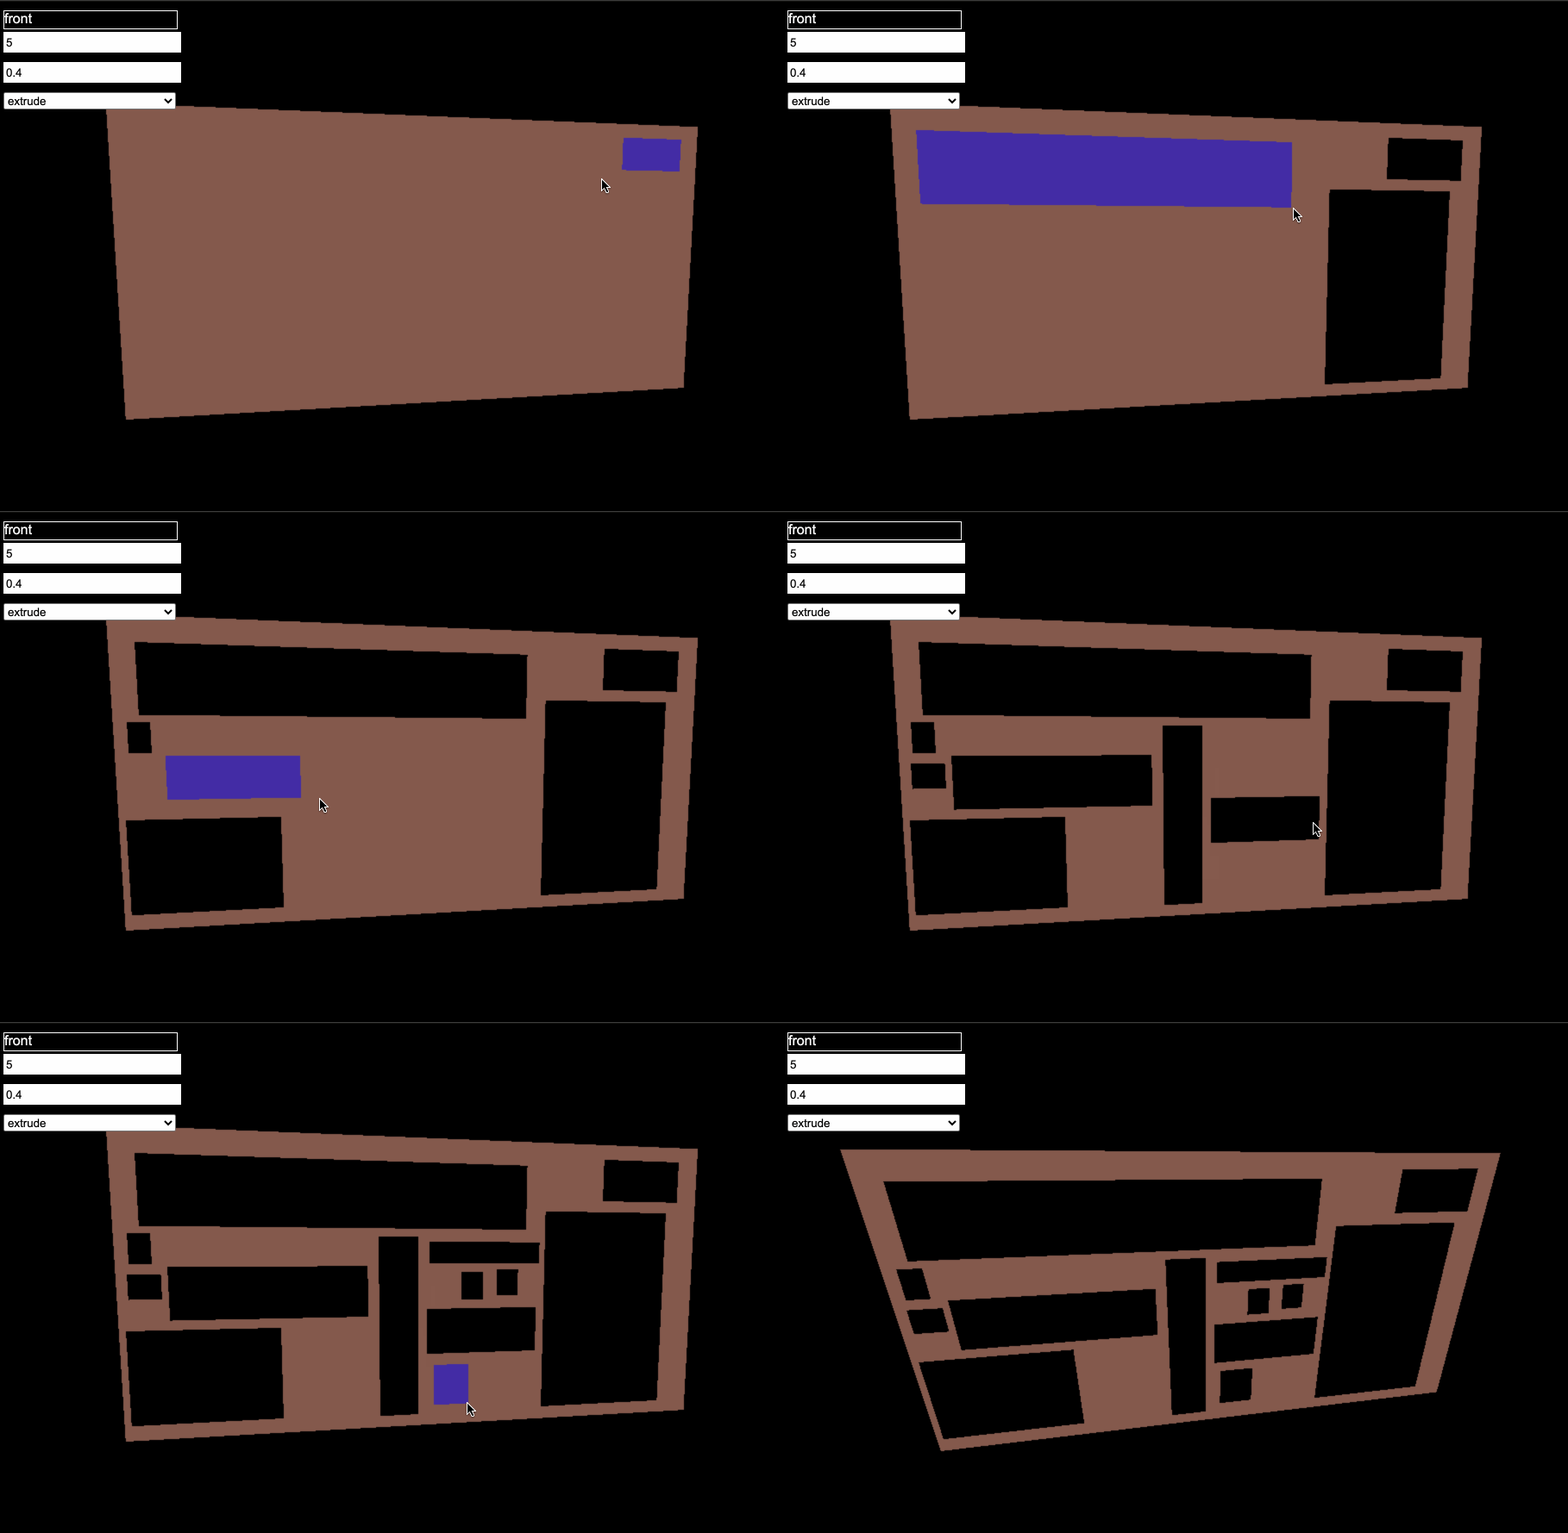
Demonstration of multiple holes being added to a single quad

I’m continuing to work on my web-based parametric modeler for 3d-printable tech panels, and I finally solved what will likely be the hardest problem in the whole (pun not intended) project- supporting multiple holes.

At the start, the system creates six quads that can each receive mouse events. When the user holds space and click-drags to specify a new feature’s location, a couple of things happen, namely:

  1. A new hole is added to the existing quad
  2. The existing quad re-generates its faces to fill in everywhere except the hole (or holes)
  3. The new feature is created, with the hole’s points as its basis

The second step above was the doozy. If there’s only a single hole in a quad, it’s very easy to fill in the necessary faces. This is especially true since I’m making sure that quads are always represented with their points in clockwise order starting at the top left.

However, if there are multiple holes, it gets tricky. One solution would be to throw all the points into a collection and create a Deluany triangulation, but I thought I could leverage the constraints built into my system to my advantage and do something a bit simpler.

Ultimately I ended up writing my own algorithm that sweeps across from left to right, adding the vertical edges of the holes one at a time and creating triangles as needed.

The approach is to:

  • create two vertical edges for each hole
  • sort all of the edges by X-coord
  • init a sweep line with the bottom-left and top-left points of the parent quad
  • for each edge starting with the left-most:
    • start with the bottom vert
    • find either the two or three (see below) vertices in the sweep line that are directly above and below the new vert, and connect them to the vert that’s currently being inserted
    • insert the new vert into the sweep line at the appropriate position
  • after each edge is inserted, run along the vertices of the sweep line and check for any concavities. If any three vertices form a concave curve, connect the first and last with a triangle to make it convex
  • once all of that is done, finish off the quad by connecting the top-right and bottom-right vertices of the original quad to the remaining vertices of the sweep line

You might have noticed that nothing about the above mentioned removing vertices from the sweep line. You may have also noticed that I mentioned that we get either two or three vertices when comparing a new vertex to the sweep line. One of those provides the answer to the other.

Since everything, both the parent and the holes, are quads, that means that sometimes we’ll have a new vertex that has exactly the same Y-coord as an existing vertex in the sweep line (since we’re inserting the right-hand edge of a hole that already had its left-hand edge inserted). In that case, we get three vertices:

  • the vertex in the sweep line that’s below the new vert
  • the vertex in the sweep line that’s equal to the new vert (in Y-pos)
  • the vertex in the sweep line that’s above the new vert

In such a case, the algorithm connects the new vert to the middle and either the top or the bottom, whichever one *doesn’t result in the three vertices belonging to the same hole (since that would create a face inside the hole). It then removes the middle vert from the sweep line.

Web-based parametric modeler: first steps

I’ve recently started working on a web-based parametric modeler for making 3d-printable panels full of greebles/nurnies using javascript and Three.JS. The general idea is to have a base shape and allow the user to draw rectangular sections that then get filled in with additional details.

Currently, the system supports beveled extrusions and arrays of buttons, but more feature types are on the way. To see it for yourself, head here: http://adrianherbez.net/greebles/03/

PLARL: Roguelike Celebration talk

The Roguelike Celebration is an annual mini-conference on roguelike games and procedural content, currently in its fourth year. I’ve gone the past three years and its always wonderful- highly recommended.

This year, I was lucky enough to get to present a short talk on my 3d-printable roguelike, “PLARL” (short of the poly-latcic acid roguelike). The talk (along with all the other, even better talks given by other contributors), is up on youtube and viewable here:

Also, if you’d like to see the slides from the talk, they’re available here: http://www.adrianherbez.net/plarl/prez/

Also also, I have all of the code for both the OpenSCAD model generation and the JS-based maze generation available on github here: https://github.com/aherbez/plarl

PLARL: maze generation


I’ve been continuing to work on my 3d-printable roguelike, and in order to do that, I needed a way to generate mazes. OpenSCAD is a bit annoying to work with for general programming, so I instead opted to write the maze generation in javascript and export data into the OpenSCAD file.

The maze generation is based on Jamis Buck’s excellent book, “Mazes for Programmers”. The numbers in the cells are there to indicate the contents of the rooms, which can either be monsters (which deal 1-6 points of damage) or food/potions (which heal 1-6 points of health). I kept it really simple on that front- just using numbers between 11-16 for damage and 21-26 for health regen, since all I needed was an easy way to pass the number and type into the OpenSCAD code.

The end result of the mazegen is a set of integer values representing the exists for each cell (each of the cardinal directions being represented by a unique power of 2 and added together), as well as for the contents. Those arrays are pasted into the OpenSCAD source to actually generate the level

To see the generation for yourself, head here: http://www.adrianherbez.net/plarl/mazegen/

Ghast Blasters (Bose AR Gamejam)


This was a game prototype created in Unity for a gamejam sponsored by Bose, which was a competition to create games their audio AR hardware. I was part of a four-person team, including:
Eli Delventhal
Goose Gutierrez
Mario Godoy
Eli and I were responsible for all the code, Goose for the art, and Mario for the music and sound effects.

Ghast Blasters is a cooperative game where two players work together to defeat supernatural terrors. One player is tasked with locating ghostly threats using spatialized audio via the Bose AR glasses, while the other draws arcane sigils on a phone or tablet to seal them away.

The phone player “sees” through the eyes of the AR player, and can provide feedback (“Turn left!”, “To your right!”) to help them orient to the enemies. They also have a radar screen to see where enemies are in relation to the AR player.

Introducing: VRComix.net

VRComix.net : hand-drawn virtual worlds

I’ve been having a lot of fun with equirectangular projections, and wanted a place to share them in a VR-friendly way. To that end, I’ve set up VRComix.net. Each post there is an equirectangular image wrapped in a simple A-Frame scene to allow it to be viewed in any WebVR-compatible headset.

A-Frame worked really great for this, since all I really needed way to display the image as the skybox of a scene in a WebVR-compatible way. Using A-Frame allowed me to just have a very simple snippet instead of a non-trivial amount of code. I’ll still be sticking with ThreeJS or direct WebGL for other projects, but it was definitely the right tool for the job for this one.